['electroncircuits.blogspot.com'];
Showing posts with label Computer Related. Show all posts

Make A Cheap USB Powered Fan

Find out how to make a cheap yet quite efficient fan from parts purchased at the dollar store. This fan can be made for about $2 (plus tax). It would be even better if you can get a double ended USB wire, in which case you could make 2 USB fans for $3 (plus tax). That definitely beats the $15 or $20 stores tend to charge for the same kind of devices.[Link]


Phone Lines Used for Setting Up Whole House Speaker System

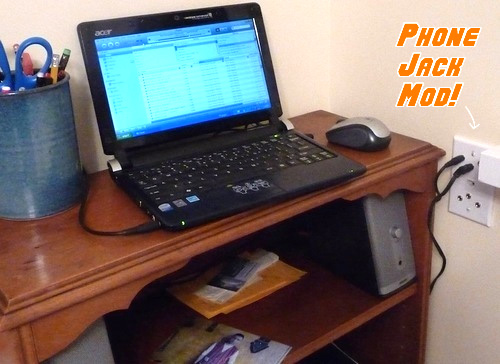
The project illustrates the use of pre-existing telephone wiring system in order to run a house-wide and low cost audio system, as seen in the image below. It would be expensive to use podcasts or Internet radio for streaming audio around the house. For a 3-level house, this would permit the same audio to be played throughout although the sensibilities of audiophiles may be violated since the ON/OFF and volume controls are on the remote speakers.

Hacks and Mods: Phone Lines Used for Setting Up Whole House Speaker System

Pictured in the image below is the master jack that contains an extra port that will be used for input. This is responsible for feeding the audio into the network after taking from the laptop. The 3.5mm headphone jacks are accommodated by all the rest which are stationed around the house. This implies that any big stereos or iPod earphones that is preferred can be plugged in.

Hacks and Mods: Phone Lines Used for Setting Up Whole House Speaker System

The power to run the stereos is the coolest thing about this hack wherein it can be supplied using the Cat 3 telephone cable, which contains 8 strands, through the network. This will work only if the lines have 3 extra wires and no land line is in use. The wiring in the a wall junction box is shown in the picture below which illustrates how simple it was constructed using basic circuitry and soldering required. For each stereo running from each socket, this will save having two wires.

Hacks and Mods: Phone Lines Used for Setting Up Whole House Speaker System

Another image shows a cover panel for an in-wall junction box which shows both speaker jacks and a phone jack while using Cat 3 wire. the 4 screws at the bottom can connect to a 2-line phone via the Cat 3 phone jack in the cent and the 3 screws at the top are for the audio jacks. To secure the wood to the box, a double-side tape will work well.

Hacks and Mods: Phone Lines Used for Setting Up Whole House Speaker System

A Simple Hard Drive Switch


Readers of this blog who have both a PC and children face a particular problem. Since the young tend not to be too circumspect in their surfing habits, parents’ files are in permanent danger of being infected with viruses or deleted. There is also the risk of children or their friends gaining unauthorized access to files not intended for their eyes.

Perhaps a separate PC for the children would take up too much space or is ruled out for pedagogical reasons; in that case, the solution is to install two separate hard drives in the PC, one for the children and one for the adults. Ideally the two hard drives will each carry their own operating system and have their own software installed. As long as things are arranged so that the children can only boot their own drive, the parents’ data will remain secure.

All that is required, besides a second drive, is a specially-designed hard drive switch. This can be achieved, as has already been described in this blog Electronics, by switching the two drives between master and slave modes using the IDE cable, and only activating the master drive in the BIOS. However, the IT skills of children should not be underestimated: the BIOS is easily changed back. The solution described here is a bit more secure.

Both drives are bootable and configured as masters. One is connected to IDE bus 1, and the other to IDE bus 2. The power supply voltages (+12 V and +5 V) are, however, only applied to one drive at a time. In principle, a simple double-pole changeover switch would do the job, but that has the disadvantage that it is possible to forget to reset the switch to child mode after use, especially if the switch is hidden.

Circuit Project: Hard Drive Switch circuit diagram
A better solution is to have to press a (hidden) button during boot to put the machine into parent mode. We will now see how this is done. If the button is not pressed when the PC is switched on, then, after a short delay of about 0.7 s (determined by R1, C1, D2 and the base-emitter junction threshold voltage of the Darlington pair formed by T1 and T2) RE2 pulls in. RE1 remains un-energized and hence the children’s drive connected to K2 is active.

Subsequently pressing S1 has no effect since RE1 has been isolated by the contacts of RE2. If the secret button is pressed, either briefly or continuously, during the 0.7 s sensitive period after the computer is switched on, RE1 pulls in immediately and holds itself in this state. D3 now prevents RE2 being subsequently activated. Since the contacts of RE1 have changed over, the PC now boots from the parents’ drive.

It is impossible to forget to return the computer to child mode, since the computer will always start up in this mode if the secret button is not pressed. A 12 V miniature relay with contacts rated for 100mA is suitable for RE2. The contacts of RE1 should be rated for the currents taken by a typical hard disk drive (say 2 A to 3 A). A key switch can be used instead of a secret button as a last resort against resourceful children, since the circuit will continue to operate correctly if S1 is left in parent mode permanently while the computer is on.

Laptop Protector Circuit Diagram

Protect your valuable laptop against theft using this miniature alarm generator. Fixed in-side the laptop case, it will sound a loud alarm when someone tries to take the laptop. This highly sensitive circuit uses a homemade tilt switch to activate the alarm through tilting of the laptop case. The circuit uses readily available components and can be assembled on a small piece of Vero board or a general-purpose PCB. It is powered by a 12V miniature battery used in remote control devices. IC TLO71 (IC1) is used as a voltage comparator with a potential divider comprising R2 and R3 providing half supply voltage at the non-inverting input (pin 3) of IC1. The inverting input receives a higher voltage through a water-activated tilt switch only when the probes in the tilt switch make contact with water.
When the tilt switch is kept in the horizontal position, the inverting input of IC1 gets a higher voltage than its non-inverting input and the output remains low. IC CD4538 (IC2) is used as a monostable with timing elements R5 and C1. With the shown values, the output of IC2 remains low for a period of three minutes. CD4538 is a precision monostable multivibrator free from false triggering and is more reliable than the popular timer IC 555.Its output becomes high when power is switched on and it becomes low when the trigger input (pin 5) gets a low-to-high transition pulse. The unit is fixed inside the laptop case in horizontal position. In this position, water inside the tilt switch effectively shorts the contacts, so the output of IC1 remains low. The alarm generator remains silent in the standby mode as trigger pin 5 of IC2 is low.
Circuit diagram
Laptop Protector  Circuit diagram
When someone tries to take the laptop case, the unit takes the vertical position and the tilt switch breaks the electrical contact between the probes Immediately the output of IC1 becomes high and monostable IC2 is triggered. The low output from IC2 triggers the pnp transistor (T1) and the buzzer starts beeping. Assemble the circuit as compactly as possible so as to make the unit matchbox size. Make the tilt switch using a small (2.5cm long and 1cm wide) plastic bottle with two stainless pins as contacts. Fill two-third of the bottle with water such that the contacts never make electrical path when the tilt switch is in vertical position.
Make the bottle leak-proof with adhesive or wax. Fix the tilt switch inside the enclosure of the circuit in horizontal position. Fit the unit inside the laptop case in horizontal position using adhesive. Use a miniature buzzer and a micro switch (S1) to make the gadget compact. Keep the laptop case in horizontal position and switch on the unit. Your laptop is now protected.
Author : D. Mohan Kumar – Copyright : www . efymag . com

Speaker-Headphone Switch Circuit Diagram For Computers

If you need to use a headset with your PC, then you will know how frustrating it is continuously swapping over speaker and microphone cables. This is even worse if the PC is parked in a dark corner and the hard-to-read writing on the sound card sockets is covered in dust. This simple switch box eliminates all these problems. It sits on top of the desk and connects to the PC with stereo one-to-one cables.
On the rear of the box are sockets for the PC speaker and microphone connections and the existing speakers. On the front of the box are the sockets for the headset microphone and headphones, an input for an external microphone and two switches. One switch is used to direct the sound card output from the PC to either the existing speakers or the headphones.
Circuit diagram:
speaker-headphone-switch-circuit-diagram
The second switch connects either the headset microphone or the external microphone to the input socket of the PC sound card. The switches used were 3 position 4 pole rotary switches with the last pole unused and adjusted for 2-position operation. All sockets were stereo 3.5mm types. This multiple switching arrangement is very flexible and is especially handy if you want to use an external microphone while monitoring with headphones. The ground wire as well as the left and right wires are all switched to prevent noise that could otherwise be induced into the microphone input through joining separate earths. For the same reason, a plastic case is used so that the earths of the sockets are not shorted together as would happen with a metal case. You will require two additional short stereo extension cables to connect the box to the PC.
Author: Leon Williams - Copyright: Silicon Chip Electronics

Usb Power Socket Circuit Diagram

Today, almost all computers contain logic blocks for implementing a USB port. A USB port, in practice, is capable of delivering more than 100 mA of continuous current at 5V to the peripherals that are connected to the bus. So a USB port can be used, without any trouble, for powering 5V DC operated tiny electronic gadgets. Nowadays, many handheld devices (for instance, portable reading lamps) utilise this facility of the USB port to recharge their built-in battery pack with the help of an internal circuitry.Usually 5V DC, 100mA current is required to satisfy the input power demand. Fig. 1 shows the circuit of a versatile USB power socket that safely converts the 12V battery voltage into stable 5V.
Circuit diagram:
Usb Power Socket Circuit Diagram

This circuit makes it possible to power/recharge any USB power-operated device, using in-dash board cigar lighter socket of your car. The DC supply available from the cigar lighter socket is fed to an adjustable, three-pin regulator LM317L (IC1). Capacitor C1 buffers any disorder in the input supply.Resistors R1 and R2 regulate the output of IC1 to steady 5V, which is available at the ‘A’ type female USB socket.
usb-power-socket-circuit-block-diagram1
Red LED1 indicates the output status and zener diode ZD1 acts as a protector against high voltage. Assemble the circuit on a general-purpose PCB and enclose in a slim plastic cabinet along with the indicator and USB socket. While wiring the USB outlet, ensure correct polarity of the supply. For interconnection between the cigar plug pin and the device, use a long coil cord as shown in Fig. 2. Pin configuration of LM317L is shown in Fig. 3.
Author : T.K. Hareendran - Source : EFY Mag

How To Connect Two Computers Using Modems

Have you ever connected two PCs together via modems using a twisted pair cable and nothing happened? That’s because the modems are expecting a phone line with all the signals and voltages supplied by the local telephone exchange. This circuit simulates the DC power and signal isolation but not the "dial tone" or the "ring signal". It suffices to connect two PCs together to communicate and exchange files using HyperTerminal.
The circuit is self-explanatory and needs only one power supply for both modem lines. Although 50V DC is the usual exchange line voltage, this circuit should operate down to 20V. A 600O line transformer (eg. Jaycar cat. MM-1900) provides signal isolation, while the resistors provide current limiting and keep the lines as balanced as possible. When using this set-up with HyperTerminal, you should not select a Windows modem driver in the "Connect To" dialog. Instead, connect directly to the relevant COM port.
connect-two-pcs-using-modems

Next, verify that the modems are working by sending information commands such as "ATI1" or "ATI3". If you don’t get a response using these commands, try resetting the modem(s) using the "AT&Z" command. Assuming you do get a response, set one in originate mode using the "ATD" command and the other in answer mode with the "ATA" command. If all is well, you should now be able to type in one terminal window and see the results echoed in the second PC’s terminal window. To return to control mode, type "+++". The advantage of using modems instead of a serial cable between COM ports is that the two PCs can be kilometres apart instead of a few metres. For example, you could connect the house PC to the workshop PC on the other side of the farm.
Author: Filippo Quartararo - Copyright: Silicon Chip Electronics

Computer Off Switch Circuit

How often does it happen that you close down Windows and then forget to turn off the computer? This circuit does that automatically. After Windows is shut down there is a ‘click’ a second later and the PC is disconnected from the mains. Surprisingly enough, this switch fits in some older computer cases. If the circuit doesn’t fit then it will have to be housed in a separate enclosure. That is why a supply voltage of 5 V was selected. This voltage can be obtained from a USB port when the circuit has to be on the outside of the PC case. It is best to solder the mains wires straight onto the switch and to insulate them with heat shrink sleeving. C8 is charged via D1.
This is how the power supply voltage for IC1 is obtained. A square wave oscillator is built around IC1a, R1 and C9, which drives inverters IC1c to f. The frequency is about 50 kHz. The four inverters in parallel power the voltage multiplier, which has a multiplication of 3, and is built from C1 to C3 and D2 to D5. This is used to charge C5 to C7 to a voltage of about 9 V.The generated voltage is clearly lower than the theoretical 3x4.8=14.4 V, because some voltage is lost across the PN-junctions of the diodes. C5 to C7 form the buffer that powers the coil of the switch when switching off. The capacitors charge up in about two seconds after switching on. The circuit is now ready for use. When Windows is closed down, the 5-V power supply voltage disappears. C4 is discharged via R2 and this results in a ‘0’ at the input of inverter IC1b. The output then becomes a ‘1’, which causes T1 to turn on.
Circuit diagram:
computer-off-switch-circuit-diagramw
A voltage is now applied to the coil in the mains switch and the power supply of the PC is turned off. T1 is a type BSS295 because the resistance of the coil is only 24R. When the PC is switched on, the circuit draws a peak current of about 200 mA, after which the current consumption drops to about 300 µA. The current when switching on could be higher because this is strongly dependent on the characteristics of the 5-V power supply and the supply rails in the PC. There isn’t much to say about the construction of the circuit itself. The only things to take care with are the mains wires to the switch. The mains voltage may not appear at the connections to the coil. That is why there has to be a distance of at least 6 mm between the conductors that are connected to the mains and the conductors that are connected to the low-voltage part of the circuit.
Author: Uwe Kardel - Copyright: Elektor Electronics Magazine

USB Switch For Printers Circuit Diagram

This circuit switches a printer’s USB connection from a PC to a laptop. What was needed was a method of allowing a laptop to use the printer occasionally while at all other times the printer would be connected to the PC. Instead of unplugging the printer from the PC and then into the laptop, the circuit switches the USB connection automatically. K1 and K2 are standard type-B USB sockets, while K3 is a USB type-A socket. The USB lead from the laptop plugs into K2 while the PC’s USB lead plugs into K1. A USB cable from K3 connects the printer to this circuit. The cable from the PC is always plugged in while the cable from the laptop is only connected whenever this device needs to print. In normal operation the laptop is not connected to K2, so the USB signal to the printer comes from the PC via K1, the normally closed contacts of relay Re1, through to K3 and from there to the printer.
Circuit diagram:
usb-switch-for-printers-circuit-diagramw
Whenever the laptop is connected up, the presence of the 5-volt power signal on its USB port causes Re1 to switch over to the printer’s connection to K2 and the laptop. Unplugging the laptop returns control of the printer back to there PC. The circuit was tested on a USB 1.1 compliant printer and a PC and laptop that had USB-2.0 high-speed ports. The PCB traces for D+ and D– should be kept as short as possible and ideally should be the same length. The relay should be a low-power type (5 V at 100 mA coil current) with two changeover (c/o) contacts. Switch S1 is only required in situations where the two computers you want to select between are permanently present and connected up to the circuit. The switch then selects the computer having access to the printer.
Author: Liam Maskey - Copyright: Elektor Electronics

Digital Isolation up to 100 Mbits

When it is necessary to send a digital signal between two electrically isolated circuits you would normally choose an optoisolator or some form of transformer coupling. Neither of these solutions is ideal; optocouplers run out of steam beyond about 10 MHz and transformers do not have a good low frequency (in the region of Hertz) response.
The company NVE Corporation (www.nve.com) produces a range of coupler devices using an innovative ‘IsoLoop’ technology allowing data rates up to 110 Mbaud. The example shown here uses the IL715 type coupler providing four TTL or CMOS compatible channels with a data rate of 100 Mbit/s. Inputs and outputs are compatible with 3.3 V or 5 V systems. The maximum isolation voltage is 2.5 kV and the device can cope with input transients up to 20 kV/µs.
Circuit diagram:
digital-isolation-up-to-100 -bits-circuit-diagramw

Digital Isolation up to 100 Mbits Circuit Diagram

The company produce many other configurations including bidirectional versions that would be suitable for RS485 interfacing. The IsoLoop coupler is based on relatively new GMR (GiantMagnetoResistive) technology. The input signal produces a current in a planar coil. This current generates a magnetic field that produces a change in resistance of the GMR material.
This material is isolated from the planar coil by a thin film high voltage insulating layer. The change in resistance is amplified and fed to a comparator to produce a digital output signal. Differences in the ground potential of either the input or output stage will not produce any current flow in the planar coil and therefore no magnetic field changes to affect the GMR material. Altogether the circuit provides a good electrical isolation between input and output and also protects against input signal transients (EMV).
Author: Gregor Kleine - Copyright: Elektor July-August 2004

Hard Disk Switch Cicuit

In these times with viruses and other threats from the Internet it would be nice to have reassurance that the PC cannot be infected. That is why this circuit was designed. It makes it possible to install multiple hard disks inside the case of a PC, which are separated in such a way that viruses cannot move from one disk to another. In this case there are three drives installed, one for use of the Internet via ADSL, one for working with email and one for other applications.

If data from the Internet never arrives on the third disk, it is effectively protected against viruses. The solution outlined here has been in satisfactory use for a couple of years. There is an additional benefit: if there are ever any problems with the operation of the computer, then it is very easy to change to another hard disk to check if the problem manifests itself there as well. In this case, fault finding can be made much easier. The circuit operates by only switching over the power supply voltages (5 V and 12 V) of the hard disks. The hard disk is out of service without a power supply. This works without a problem with S-ATA disks.

Circuit diagram:

hard-disk-switch-circuit-diagramw

Hard Disk Switch Circuit Diagram

With IDE disks this only works with modern drives. There may only be a combination of hard disks on the relevant port and no CD-ROM, DVD-drive, CD-burner or something similar. The selection of the desired hard disk is done with a rotary switch. This has to be set to the correct position before the computer is switched on. When the power supply is turned on, one of three relays is driven via diode D1, D2 or D3. The relays are provided with a hold circuit via a second diode (D4, D5 and D6). In this way the selected relay remains energised as long as the power supply voltage is present.

After switching on, electrolytic capacitor C1 is charged via R1, so that the common contact of the rotary switch is quickly at 0 V. This prevents an accidental change of hard disk while the computer is in operation. The ADSL modem is powered from the PC. This power supply voltage is only present if hard disk number 2 is selected. This prevents the use of the Internet if one of the other disks is selected.

Author: Uwe Kardel - Copyright: Elektor Electronics Magazine

USB Operated Home Appliances Cicuit

When turning a computer on and off, various peripherals (such as printers, screen, scanner, etc.) often have to be turned on and off as well. By using the 5-V supply voltage from the USB interface on the PC, all these peripherals can easily be switched on and off at the same time as the PC. This principle can also be used with other appliances that have a USB interface (such as modern TVs and radios). This so-called ‘USB-standby-killer’ can be realized with just 5 components. The USB output voltage provides for the activation of the triac opto-driver (MOC3043) which has zero-crossing detection. This, in turn, drives the TRIAC, type BT126.

Circuit diagram:

usb-standby-killer-circuit-diagram

USB Operated Home Appliances Circuit Diagram

The circuit shown is used by the author for switching loads with a total power of about 150 W and is protected with a 1-A fuse. The circuit can easily handle much larger loads however. In that case and/or when using a very inductive load a so-called snubber network is required across the triac. The value of the fuse will also need to be changed as appropriate. The circuit can easily be built into a mains multi-way powerboard. Make sure you have good isolation between the USB and mains sections.

Source : www.extremecircuits.net

Monitor Life Extender

This circuit was designed to protect a computer monitor from overheating. It is recommended to attach this circuit to power users’ monitors! Most computer monitors of the CRT type fail owing to over-heating. After one or two hours of use, the rear of a monitor may become as hot as 45 degrees C, or 20 degrees above ambient temperature. Most heat comes from the VGA gun drivers, the horizontal circuit, vertical circuit and power supply. The best possible way to extract heat and so prolong monitor life (and save the environment) is to add a brushless fan, which is lighter, energy-wiser and more efficient than a normal fan.

In the diagram, diodes D2, D3 and D4 sense the monitor’s temperature. These diodes have a total negative temperature coefficient of 6 mV per degree Celsius. To eliminate noise, shielded wire should be used for the connection of the temperature sensor to the circuit sensor. The +12-V supply voltage is borrowed from the computer’s power supply. Alternatively, a mains adapter with an output of 12 VDC may be used. C1 and C2 are decoupling capacitors to eliminate the ripple developed by switching or oscillation. R1 provides bias current to D1, a 6-V zener diode acting as a reference on the non-inverting pin of opamp IC2.B.

IC1, a ‘precision shunt regulator’ raises the sensor diodes’ voltage to just over 6 V depending on the adjustment of P1. C4 is the decoupling capacitor with the sensor network. Integrator network R4-C5 provides a delay of about 3 seconds, transforming the on/off output signal of IC2.B into an exponentially decreasing or increasing voltage. This voltage is fed to pin 3 of the second opamp, IC2.A. The hard on/off technique would produce a good amount of noise whenever the load is switched, hence an alternative had to be found. IC3, a TLC555, is used as an astable multivibrator with R5 and C6 controlling the charging network that creates a sawtooth voltage with a frequency of about 170 Hz.

Circuit diagram:

monitor-life-xtender-circuit-diagramw

Monitor Life Extender Circuit Diagram


This sawtooth is coupled to pin 2 of IC2.A, which compares the two voltages at its input pins and produces a PWM (pulsewidth modulated) output voltage. The sawtooth wave is essential to the PWM signal fed to power output driver T1 by way of stopper resistor R6. The power FET will switch the fan on and off fan according to the PWM drive signal. The back emf pulses that occur when T1 switches on and off are clamped by a high-speed diode, D7. Initially, turn P1 to maximum resistance.

Blow hot air from a hair dryer onto the sensor-diodes for a minute or so, then get the temperature meter near the sensor diodes and adjust P1 slowly towards the minimum resistance position with a digital meter hooked up on pin 7 of IC2.B. Roughly calibrate the temperature to 40 degrees C. At this temperature, the meter will show approximately 12 V. The circuit will draw about 120 mA from its 12-V supply.

Author: Myo Min - Copyright: Elektor July-August 2004

USB Fuse

Life in the 21st century would be almost unbearable without some of the computer peripherals that PC users now look on as essentials - take for example the USB powered teacup warmer; this device is obviously an invaluable productivity tool for all users but it could prove a little tire some if the extra current it draws from the USB port is sufficient to produce a localised meltdown on the motherboard. In a slightly more serious vein a similar situation could result from a carelessly wired connector in the design lab during prototyping and development of a USB ported peripheral. What’s needed here is some form of current limiting or fuse to prevent damage to the motherboard.

usb-fuse-circuit1  

The MAX1562 shown in Figure 1 is a purpose-built USB current limiter from the chip manufacturers Maxim. The device operates with a supply voltage from 4.0 to 5.5 V with an operating current of typically 40 µA or 3 µA in standby mode. The circuit introduces a very low resistance in the power line (typically 26 m but guaranteed less than 50 m) from an internal MOSFET. The FET gate bias voltage is generated on-chip from a charge pump circuit.

usb-fuse-circuit-diagram2

The chip can distinguish between an overload and a short circuit condition in the supply line by measuring the voltage drop across its internal resistance; if the voltage is less than 1 V a short circuit is assumed and the chip pulses a (limited) output current every 20 ms in an effort to raise the output voltage. This approach will eventually be successful if the short circuit was caused by a large value capacitor across the USB supply pins or an external hard drive which have a high in-rush at start up. If the supply rail is not pulled up within the first 20 ms the FAULT output (pin 2) is driven low. The output current limit is set by a single resistor on pin 4 (ISET): LIM = 17120 / RSET.

usb-fuse-parts-pcb-layout3

The circuit diagram shows a fixed 5.6k resistor in series with a 10k preset giving an adjustable current limit between 1.097 and 3.057 A. This range should be sufficient for the majority of applications. Increasing the preset resistance reduces the current limit level. Any intermittent connection in the preset (caused by a dirty track etc.) will switch the chip into shut down. The MAX1562 also contains a thermal cut out which turns off the output when the chip temperature exceeds 160 degrees C.

Figure 2 shows a diagram of the manufacturer’s application circuit. The FAULT output drives an LED via a series limiting resistor which reduces the LED current to 2 to 3 mA. The MAX1562 is available in a HESA variant (with an active high ON signal) or ESA version (with an active low ON signal). The chip is packaged in an 8-pin SMD outline. Figure 3 shows a small PCB layout for the circuit using mostly SMD components.

COMPONENTS LIST

Resistors
R1 = 5k6 (SMD 1206)
R2 = 1k5 (SMD 1206)
P1 = 10k preset
Capacitors
C1 = 1µF (SMD 1206)
C2 = 4µF7 10 V, tantalum
C3 = 220nF (SMD 1206)
Semiconductors
D1 = LED, low current
IC1 = MAX1562ESA

Author: Andreas Köhler - Copyright: Elektor Electronics

Home Network for ADSL

The increased availability of fast ADSL Internet connections has made it more attractive to install a small RJ45 Ethernet network in the home. Not only can you exchange files between computers, you will also have fast Internet access for everybody! This does of course require an ADSL modem with a router. It’s not possible to use a simple USB modem on its own. For laptops we recommend wireless Ethernet connections. If you find the laying of cables too difficult or inconvenient you can also add wireless capabilities to ‘ordinary’ PCs. You should bear in mind that the range of wireless connections could sometimes be disappointing. When a network is set up round a router you should use a star configuration for the cabling. This means that only a single PC is connected to each router socket.

 rj45-pinout 1

The connecting cable may have a maximum length of 90 m and usually terminates at a connection box. You should use a CAT5 cable with 8 conductors for this, which is suitable for speeds up to 100 Mb/s. The 8 conductors are arranged in 4 pairs, with each pair twisted along the length of the cable. It is extremely important that the wires of each pair are kept together and that they are kept twisted as much as possible. At the connector ends you should therefore make sure that the non-twisted sections of the cable are kept as short as possible, at most a few centimetres. Should you fail to do this you may find that the network won’t operate at the full rated speed or possibly cause interference. The wiring itself is very simple. Connect the plugs to the cables such that each pin connects to the corresponding pin at the other end.

rj45-male-female-circuit-diagram

So pin 1 to 1, 2 tot 2 and so on. This also applies to all patch leads between the connection boxes and PCs (or if you prefer, the cable can go directly to the PC, without a connection box). It is only when two computers are connected directly together without a router that a crossover cable is required. The plugs are attached to the cable using a special crimping tool. It is also possible without the tool, using just a screwdriver, but this isn’t easy and we don’t recommend that you try it. The wires in the cable have different colours and there are no official standards in Europe how you use them (EN50173). However, the colour code in the American T568B standard is often used:

  1. orange/white
  2. orange
  3. green/white
  4. blue
  5. blue/white
  6. green
  7. brown/white
  8. brown

The coloured/white wires and the solid coloured wires alternate nicely. For Ethernet cabling you only need connections 1, 2, 3 and 6. The central contacts on pins 4 and 5 are in the middle of the green pair and may be used for analogue telephones. You then have to make sure that 4 and 5 aren’t connected to the Ethernet plugs because the voltages found on analogue telephone lines are high enough to damage an Ethernet card and/or router. Wires 4 and 5 should then be routed to an RJ11 telephone socket. We don’t recommend it, but it is possible. It is also possible to pass ISDN signals through the same RJ45 plugs and cabling. In this case you can’t use the same cable for both Ethernet and ISDN, since the latter uses pins 3/6 and 4/5.

straight-through-patch-cable1

If you use patch cables it helps to keep things organised by using coloured cables. Blue for Ethernet (red for a crossover cable), yellow for analogue telephones and green for ISDN. Sticky labels or coloured cable markers can also be used for identification when you can’t get hold of coloured cables. A new standard has recently been introduced, although you probably won’t use it in the home for a while. Since around two years ago you can also use a GG45 connector, which is compatible with RJ45. This has 4 extra contacts and is suitable for speeds up to 600 Mb/s (Category 7/Class F).

crossover-patch-cable 1

Author: Karel Walraven Copyright: Elektor Electronics

A Simple IrDA Interface Circuit

Many modern motherboards are equipped with an infrared data interface compliant with the IrDA standard, but this interface not very often used. However, it is not difficult to build a data transmission module and connect it to the corresponding header. As can readily be seen from the schematic diagram, this doesn’t exactly involve a large array of ICs. This is because transceiver ICs are available for the IrDA standard, so only a few passive components have to be added to obtain an operational circuit. The author has successfully built this circuit many times using the TFDU5102 from Vishay Semiconductors (formerly Telefunken). If this IrDA transceiver is no longer available (it has been officially discontinued), the largely pin- and function-compatible TFDU6102 can be used without any problems.

Circuit diagram :

IrDA_Interface_Circuit_Diagram 1 IrDA Interface Circuit Diagram

This IC is faster and meets the latest IrDA specification. The TFDU6102 low-power receiver IC supports IrDA at data rates up to 4 Mbit/s (FIR), HP-SIR, Sharp ASK, and carrier-based remote control modes up to 2 MHz. The IC contains a photodiode, an infrared emitter and CMOS control logic. The IC also has internal protection against electromagnetic immissions and emissions, so no external screening is necessary. The IC works with a supply voltage of 2.7–5.5 V, so it is suitable for use in desktop PCs, notebooks, palmtops, and PDAs. It is also used in digital still and video cameras, printers, fax machines, copiers, projectors, and many other types of equipment.

PCB Layout

Parts_PCB_Layout_IrDA_Interface_Circuit_Diagram1Parts PCB Layout IrDA Interface Circuit Diagram

Parts:

Resistors:
R1 = 7Ω5 (shape 1210)
R2 = 47 Ω (shape 1206)
R3 = 100 k (shape 1206)
Capacitors:
C1 = 100nF (shape 1206)
C2 = 4µF7 (shape 1210)
Semiconductors:
IC1 = TFDU6102TR3 (Vishay) (Farnell)
Miscellaneous:
X1 = 5-way SIL pinheader

The author has designed a printed circuit board for the IrDA module that is only 20 × 20 mm square. Of course, this means that all of the components are SMD types. The TFDU6102 in the ‘babyface’ package is available in upright and flat versions. Here the upright version (suffix ‘TR3’) is used. Thanks to its small size, the assembled circuit board can easily be placed behind a drive bay cover or the like. It is connected to the motherboard by a five-way flat cable. The pin assignments for header X1 must match the mating connector on the motherboard. After you have fitted the module, you may have to edit the BIOS settings to activate the UART for IrDA operation. These settings enable the (Windows) operating system to boot the new device and automatically install it. You may have to briefly insert the Windows CD to modify the settings. There is an abundance of free programs on the Internet that use the IrDA interface.

Source : Author: A. Bitzer Copyright: Elektor Electronics

Automatic Mains Disconnect Circuit

Downloading and CD-burning programs usually provide the option of automatically shutting down the PC on completion of their tasks. However, this energy-saving feature is of little benefit if even after the PC has been switched off, all of the peripheral equipment remains connected to the mains and happily consumes watt-hours. The circuit shown here provides a solution to this dilemma. It is connected ahead of the power strip and connects or disconnects mains power for all of the equipment via a power relay. A connection to a 12-V PC fan (which may be the processor fan or the fan for the chipset, if the latter is present) indicates whether the PC is switched on.

If you are certain that the 12-V power supply voltage is switched off when the PC is in the sleep mode, you can use this connection instead. To switch everything on, press the Start button to cause the power relay to be energized and provide mains voltage to all of the equipment. If the PC has an ATX board, its Power switch must be pressed at the same time to cause the PC to start up. When the PC fan starts to run, low-power relay Re1 engages and takes over the function of the Start switch, which can then be released. This state is stable. If the PC switches to the sleep state, the 12-V voltage drops out.

Automatic_Mains_Disconnect

The electrolytic capacitor ensures that Re1 remains engaged for a short time, after which it drops out, followed by the power relay. D1 prevents the electrolytic capacitor from discharging through the connected fan, and D2 is the usual freewheeling diode. The system is disconnected from both mains leads and is thus completely de-energized. Be sure to select components that are suitable for their tasks. Naturally, the contacts of Re2 should be rated to handle the total current drawn by all of the peripheral equipment and the PC, and the relay coil must be suitable for use with mains voltage (6 mm minimum separation between coil and contacts).

A low-power 12-V relay that can switch mains voltage is adequate for Re2. The Start pushbutton switch is connected to the mains voltage, so a 230-V type must be used. The circuit board layout and enclosure must also be designed in accordance with safety regulations. A separation of at least 6 mm must be maintained between all components carrying mains voltage and the low-voltage components, and the enclosure must be completely free of risk of electrical shock. With a bit of skill, the circuit can be fitted into a power bar with a built-in switch, if the switch is replaced by a pushbutton switch having the same mounting dimensions.

Note:

  • The circuit is not suitable for use with deskjet printers that can only be switched on and off by a front panel button.

Source : www.extremecircuits.net

USB Printer Share Switch

This simple device allows two computers to share a single USB printer or some other USB device, such as an external flash drive, memory card reader or scanner. A rotary switch selects the PC that you wish to use with the USB device, while two LEDs indicate the selected PC.

manual-2-way-usb-device-switch-schematic-circuit-diagramw

The most common way to share a USB printer between two PCs is to use one machine as a print server. However, that’s not always convenient because it means that the server PC must always be on if you want to print something.

Picture of the project:

USB-Printer-Share

That can be a real nuisance if you just want to quickly fire up the other machine and print something out. It also means that the two PCs must be networked together, either via a hub/router or directly via an ethernet crossover cable. Another way is to use a dedicated USB print server. However, as before, this must be connected to an ethernet network, along with the PCs. Such devices also need their own power supply, generally cost well over $100 and are overkill if you just want to share a single USB printer between two computers for occasional printing in a home set-up.

Parts layout:

Parts-layout-USB-Printer-Share-Switch

That’s where this simple device comes in. It’s basically a 2-way switch box that lets you manually switch your USB printer from one PC to the other, as required. The switching is performed using a rotary switch, while two LEDs on the front panel indicate which PC has been connected to the printer. This method has several advantages. First, you don’t need to network your two computers. Second, you can print from either machine with the other turned off. And third, the device doesn’t need a power supply.

Circuit diagram:

USB-Printer-Share-Switch-circuit-Diagramw

The circuit uses switch poles S1a-S1c to select either USB socket CON1 or CON2 and connect its pins through to CON3. The fourth pole (S1d) selects either LED1 or LED2, to indicate which PC has been selected.

Source: Silicon Chip14 April 2009

Serial To Parallel Converter

This converter may help if just the serial port on a personal computer is free, whereas the printer needs a parallel (Centronics) port. It converts a serial 2400 baud signal into a parallel signal. The TxD line, pin 3, CTS line, pin 8 and the DSR line, pin 6, of the serial port are used - see diagram. The CTS and DSR signals enable handshaking to be implemented. Since the computer needs real RS232 levels, an adaptation from TTL to RS232 is provided in the converter by a MAX232. This is an integrated level converter that transforms the single +5V supply into a symmetrical ±12V on.

Serial-to-Parallel Converter Circuit Diagramw

The serial-to-parallel conversion is effected by IC1. This is essentially a programmed PIC controller that produces a Centronics compatible signal from a 2400 baud serial signal (eight data bits, no parity, one stop bit). The IC also generates the requisite control signals. If there is a delay on the Centronics port, the RS232 bitstream from the computer may be stopped via the Flow signal (pin 17). This ensures that no data is lost. The controller needs a 4 MHz ceramic resonator, X1.

Source : www.extremecircuits.net

USB Power Injector For External Hard Drives

header01

A portable USB hard drive is a great way to back up data but what if your USB ports are unable to supply enough "juice" to power the drive? A modified version of the Silicon Chip Usb Power Injector is the answer. For some time now, the author has used a portable USB hard drive to back up data at work. As with most such drives, it is powered directly from the USB port, so it doesn’t require an external plug pack supply.

Project's Picture:

finished-projects

In fact, the device is powered from two USB ports, since one port is incapable of supplying sufficient current. That’s done using a special USB cable that’s supplied with the drive. It has two connectors fitted to one end, forming what is basically a "Y" configuration (see photo). One connector is wired for both power and data while the other connector has just the power supply connections. In use, the two connectors are plugged into adjacent USB ports, so that power for the drive is simultaneously sourced from both ports.

USB Cable:

usb-cables

An external USB hard drive is usually powered by plugging two connectors at one end of a special USB cable into adjacent USB ports on the computer. This allows power to be sourced from both ports. According to the USB specification, USB ports are rated to supply up to 500mA at 5V DC, so two connected in parallel should be quite capable of powering a portable USB hard drive – at least in theory.

Complete Project:

Complate project-in-box

Unfortunately, in my case, it didn’t quite work out that way. Although the USB drive worked fine with several work computers, it was a "no-go" on my home machine. Instead, when it was plugged into the front-panel USB ports, the drive repeatedly emitted a distinctive chirping sound as it unsuccessfully tried to spin up. During this process, Windows XP did recognise that a device had been plugged in but that’s as far as it went – it couldn’t identify the device and certainly didn’t recognize the drive. Plugging the drive into the rear-panel ports gave exactly the same result. The problem wasn’t just confined to this particular drive either. A newly-acquired Maxtor OneTouch4 Mini drive also failed to power up correctly on my home computer, despite working perfectly on several work computers.

Circuit diagram:

circuit diagram

The revised USB Power Injector is essentially a switch and a 5V regulator. The Vbus supply from USB socket CON1 turns on transistor Q1 which then turns on power Mosfet Q2. This then feeds a 6V DC regulated supply from an external plug pack to regulator REG1 which in turn supplies 5V to USB socket CON2.

Source: Silicon Chip 26 June 2008